Making your own rock painting insects is a fun DIY craft project for kids of all ages. Rock painting is a fun craft for both kids and adults.
Perfect to go along with a homeschool insect unit of study or as handmade garden art!
This rock painting craft for kids is perfect for creative kids. Or they make great gifts for kids if you enjoy craft projects.
You only need a few supplies to make these colorful insect painted rocks.
For more rock painting tutorials:

This Post May Contain Affiliate Links. Please Read Our Disclosure Policy.
Jump to:
Finding Bugs to Get You Started
Kids love exploring the yard and garden during the spring, summer, and fall to hunt for bugs and insects.
Paint your rocks to look like a few of the bugs you find out in the garden. Real life insects or even children's books about bugs can also provide you with inspiration to get you started.

Eric Carle's colorful books, The Very Hungry Caterpillar and the Very Clumsy Click Beetle are great picks for kids. Two of these bug painted rocks were designed based off of those two books!

For basic images, insect printables can be used for inspiration. When I created my collection of insect rocks, I used a combination of all of these sources for inspiration.
However, if you are doing this DIY craft with young kids, I would recommend keeping it simple and using one source for inspiration.
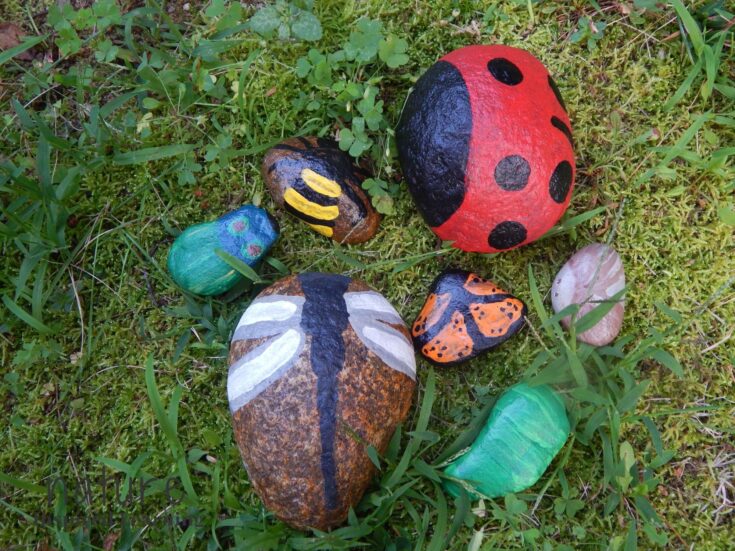
Rock Painting Insects Ideas for Kids
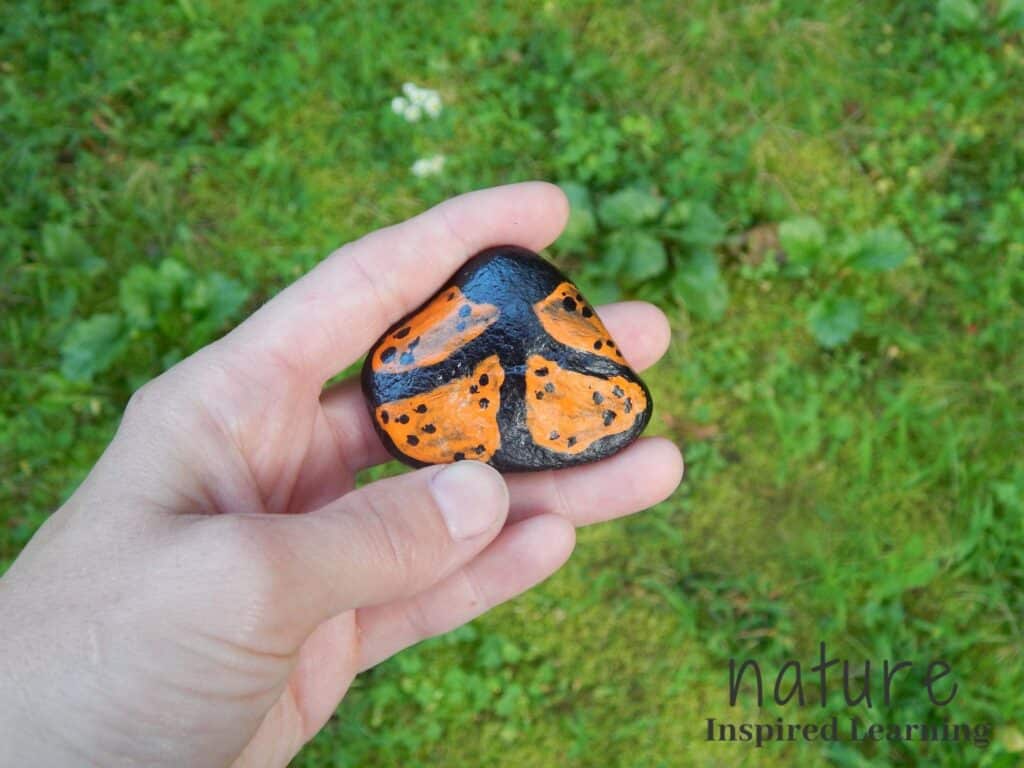
- Butterflies and Moths
- Different Caterpillars
- Beetles and Ladybugs
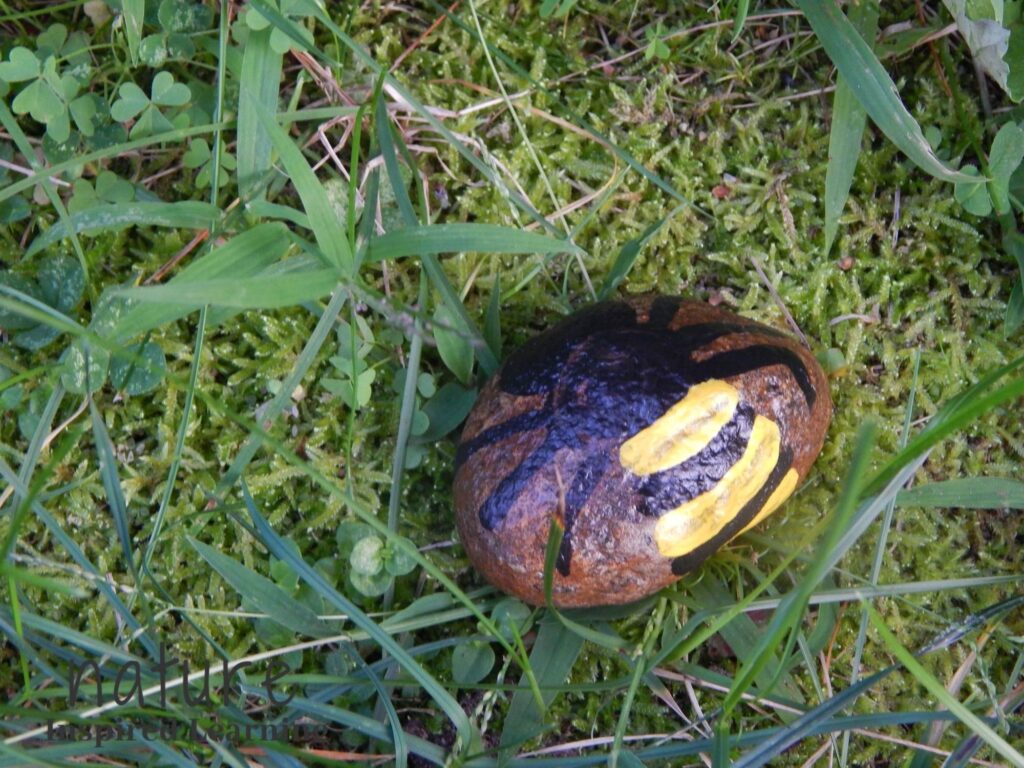
- Honey Bees
- Dragonflies
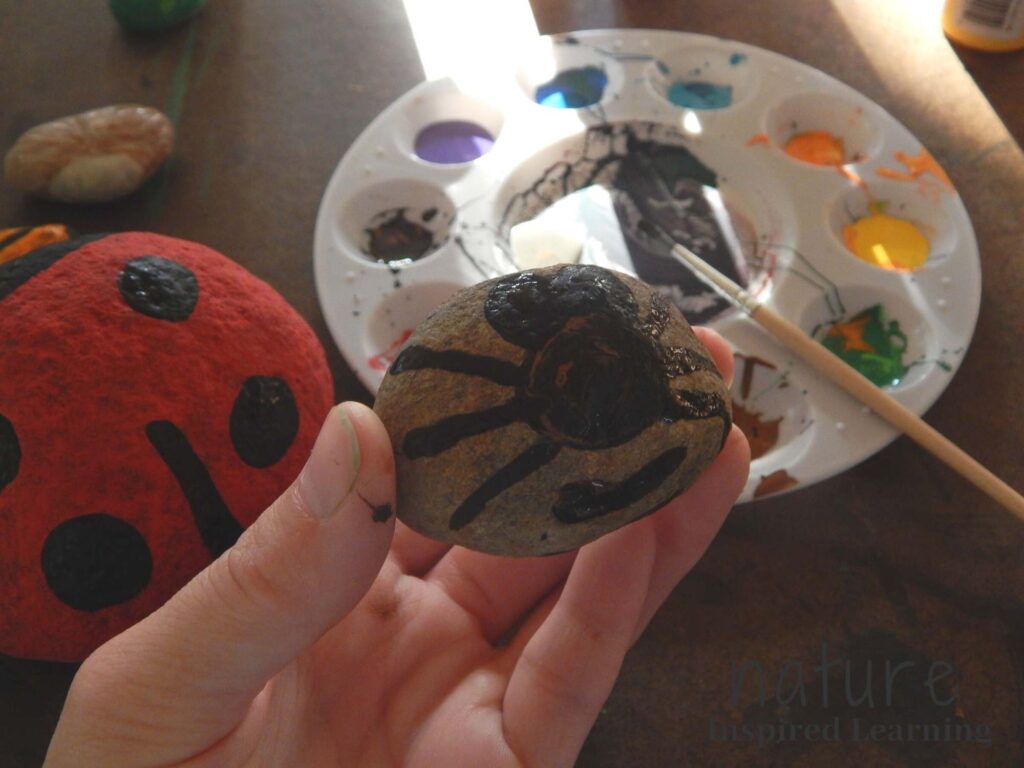
- Spiders
- Ants
The types of insects you paint are really up to you! Popular choices are butterflies, bees, and ladybugs.
Kids love to get creative and come up with their own insect creations. Children can paint rocks based on real life insects or bugs they make up in their imagination.

Painting Insect Rocks Supplies
- Rocks: collected outside or purchased online. Smooth river rocks work best, but really any type of rock will work!
- Acrylic Paint: this type of paint will stick to surfaces including rocks. Matte or satin finish acrylic paint can be used for rock painting.
- Paint Brushes: small paint brushes that don't shed while you are painting work the best. I like to have several small brushes available to use while painting.
- Painting Tray: a circular tray works well or even just a plain paper plate.
- Clear Sealant: protects the paint from coming off. I like using a gloss topcoat because it add protection and a nice shine to the rocks!
- Jar with Water and Rags: great for cleaning up and washing brushes
- Piece of Cardboard: a nice work surface to use while painting. You can also place rocks on cardboard when sealing them outside.
What I love about this craft project for kids is that you really only need a few supplies. If you live in an are with rocks, head outside with your kids to collect ones of different sizes and shapes.
I love the process of finding a rock outside and trying to decide which insect it resembles. Long smooth rocks make great caterpillar painted rocks.
Triangle shaped stones can be turned into painted butterflies or moths. Circular stones or ovals make cute beetles.

Rocks with a smooth surface make the best painted rocks, but really any type of stone can be used.
Wherever you get your rocks from, always wash and dry the rocks before you paint them to clean off any dirt or dust.
How to Seal Painted Rocks
If you want to place your rocks outside then you need to seal them first. Without a protective top coat, the paint will eventually wear away.
Sealing rocks is really easy. Not only does a top coat give your rocks a nice shine, but it keeps them looking nice for years to come!
Tips:
- Seal both sides of the rocks. I always seal the bottom of the rocks first.
- When spraying, hold the can several inches away from the rocks.
- Apply 2-3 thin coats instead of one heavy coat.
- Allow the product to dry in between coats of sealer.
- Spray rocks outside in a shady spot. You want a well ventilated area.
- Always read the directions on the product before stating as dry times will vary depending on the brand.


How to Use Insect Painted Rocks
Insect rocks have many fun and creative uses. Kids love playing with and decorating with items that they create themselves. Below are a few ideas to get you started.
- Handmade Garden Art
- Prompts for Imaginative Play
- Science Manipulatives
- Handmade Gifts
Colorful Garden Art
Once you finish painting your insect rocks, have your kids place them outside in the garden. Your kids can even add painted rocks to indoor potted plants.
Adding art to the garden is a fun way to get kids excited about gardening, insects, and spending time outside.

Imaginative Play
Insect painted rocks make great additions to story time. A great way to get your child interested in reading is to let them create a few bugs that go along with an insect book.
After you read together, they can use the bug painted rocks to recreate the scenes in the book. Young children love hands-on and imaginative play!
Science Manipulatives
If you are learning about insect life cycles with your kids, rocks can be painted to show the different stages. Painted eggs on a leaf, a caterpillar, chrysalis, then an adult butterfly painted rock.
The rocks can then be used as learning tools and manipulatives. The great part about teaching science to your kids is that you can combine printables, crafts, and different activities to learn new concepts.
Homemade Gifts
Your kids can even give away their creations as gifts. People love receiving homemade gifts especially ones created by children.
My mom still has a rock that I decorated as a young child displayed in her house. Decorated with a blue silk flower, colorful gems, and paint it is a cherished piece of original art.
Can Bug Painted Rocks Stay Outside
Yes! Once you paint the rocks, allow them to dry a few hours or even 24 hours. Then apply a clear coat to seal in the paint.
Insect painted rocks make really cute outdoor decorations for around the home and garden! Once sealed, they will stay painted for years to come.
If you live in an area that experiences frost and snow, I would bring the painted rocks indoors for the winter.
Up here in New England, most gardeners store garden art indoors on in a shed during the cold snowy months.
Once the warm weather returns, kids can have fun bringing all of the different insect painted rocks back outside.

In many communities, people will hide painted rocks outdoors. Then members of the community can search for them when going on nature walks.
You can create your own insect scavenger hunt by hiding the butterfly, bee, beetle, and caterpillar painted rocks outside in the garden.
Scavenger hunts are a great way to get kids of all ages outside and playing together.
Rock Painting Insects DIY Craft Project
This rock painting insects DIY craft project is fun for kids of all ages. Minimal supplies are needed to create these adorable insect painted rocks. Leave outside in the garden or keep indoors for creative play.
Materials
- Rocks
- Acrylic Paint
- Painting Tray
- Clear Gloss Sealer
- Cardboard
- Jar with Water
- Paper Towels
Tools
- Paint Brushes
Instructions
- Add a small amount of paint to painting tray.
- Start painting the body of the insect.
- If adding spots or stripes, add those once the insect's body is dry.
- To add eyes, add white paint and let it dry. Then add a black dot.
- Let painted insects dry for at least a few hours (24 hours is best).
- To seal, place painted rocks on a piece of cardboard outside.
- Follow the directions on the spray sealant. Typically, 2-3 light coats with time to dry in between each coat.
- Flip over the rocks then repeat step 7 to seal the bottom side.
- Once dried, rocks can be placed outside in the garden or brought back indoors.
Notes
Allow the paint to dry slightly in between colors. Black spots and eyes can be added after the insect body has been painted. Books and real life insects can provide your kids with inspiration.
When sealing, always use a well ventilated area, preferably outside. Pick a shady spot on a calm day. Apply several 2-3 thin coats to both sides.
Have you ever created rock art with your kids? Let us know in comments below!


chey
This is where memories are made. Such fabulous creations for children to make. We used to do this with the kids, and place their art in the garden. We absolutely loved it!
Julie
Absolutely! It is such a joy to include their creations in the garden. Thank you for commenting Chey.
Julia
These are soooooo cute! I can't wait to make these with my kids.
Julie
Thank you Julia, I hope you have making them together.
Danielle
These would be so fun to make! I know someone who would love to make these so I'll pass it along!
Julie
Thank you Danielle, I hope they like them!
Michelle
These are so cute!! My three year old will love this!
Julie
Perfect craft for little ones, my three year old make some too and loved it. I hope you both have fun!