Kids of all ages love learning about the night sky. There is something fascinating about stars and space. Learn how to make your own night sky process art with your kids in this step by step guide.
Whether you are exploring space during a unit study with your kids. Or are looking for a fun hands-on craft, this post is for you!
A fun activity for toddlers right up to elementary aged kids.
What is special about this art project is each of your kids gets to make their own creation.
This Post May Contain Affiliate Links. Please Read Our Disclosure Policy.
Process art is often thought of as a preschool activity, but letting your kids express themselves through art goes beyond the preschool years.
Let's be honest, this activity is even fun for you to do alongside your kids. Making and creating is such a wonderful way to have fun and relax.
What is Process Art
When making process art, the emphasis is on the creating on less on the final product.
With this process art activity, you will provide your children with a prompt along with available supplies.

However, they will have the freedom to make their own creation using what is available to them.
Some kids will use all of the materials, while others will pick and choose and only use a few.
The two examples above show very different creations that were made with the same supplies.
One is more abstract while the other resembles a real constellation that is found in the night sky.
Materials
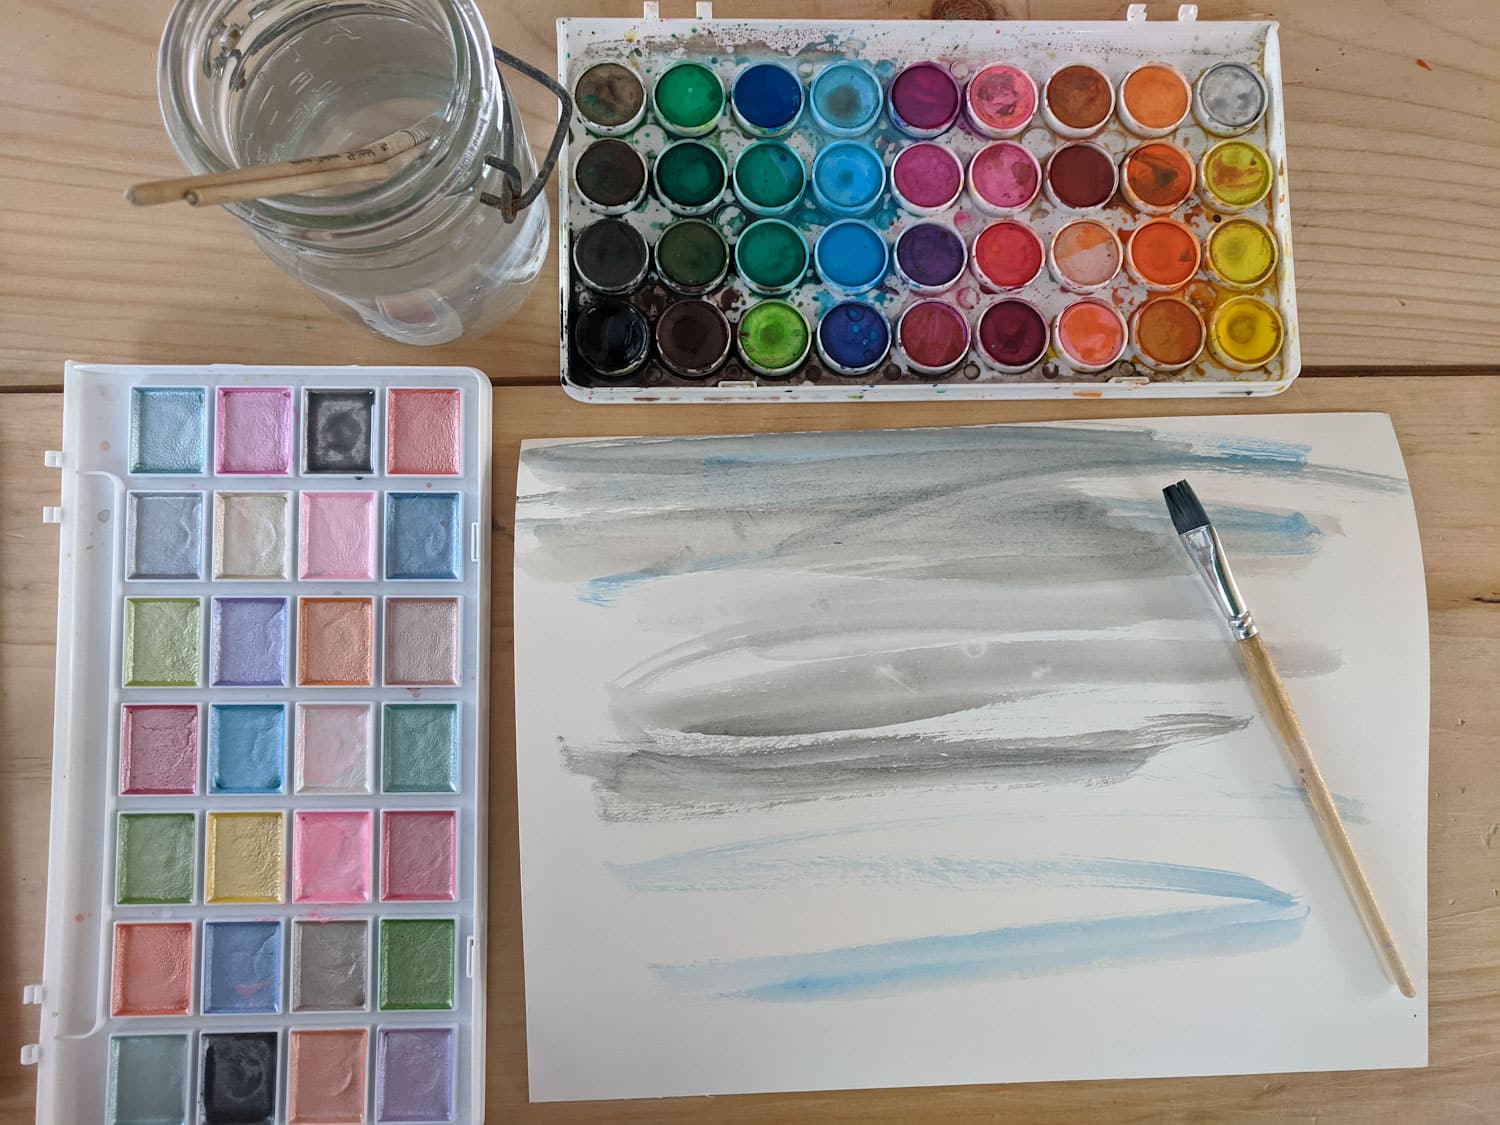
Heavy Weight Paper: you can use card stock, watercolor paper, or any heavy weighted paper for this project.
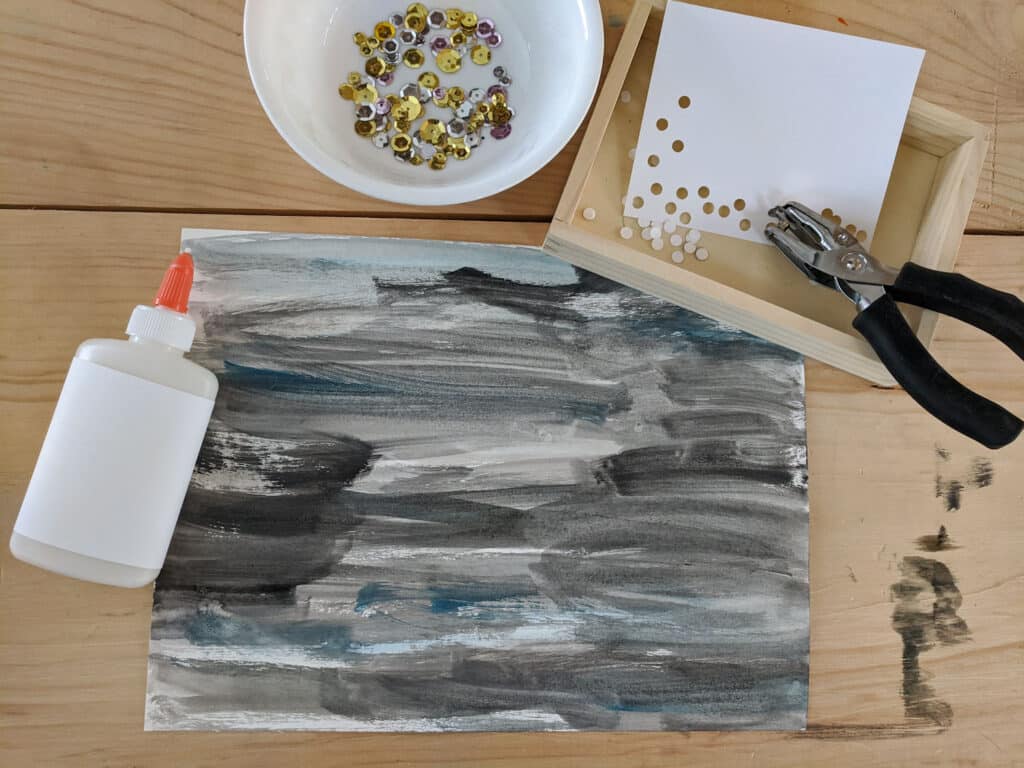
Printer Paper: A small piece for punching holes with the hole punch
Paint: watercolor paints are a great low mess option
Paint Brushes: any size paint brushes made for crafting
Liquid School Glue or Glitter Glue: the kind that comes in a squeeze bottle
Jar with Water: for clean up and rinsing brushes in between uses
Hole Punch: a hand held hole punch or even a star shaped punch
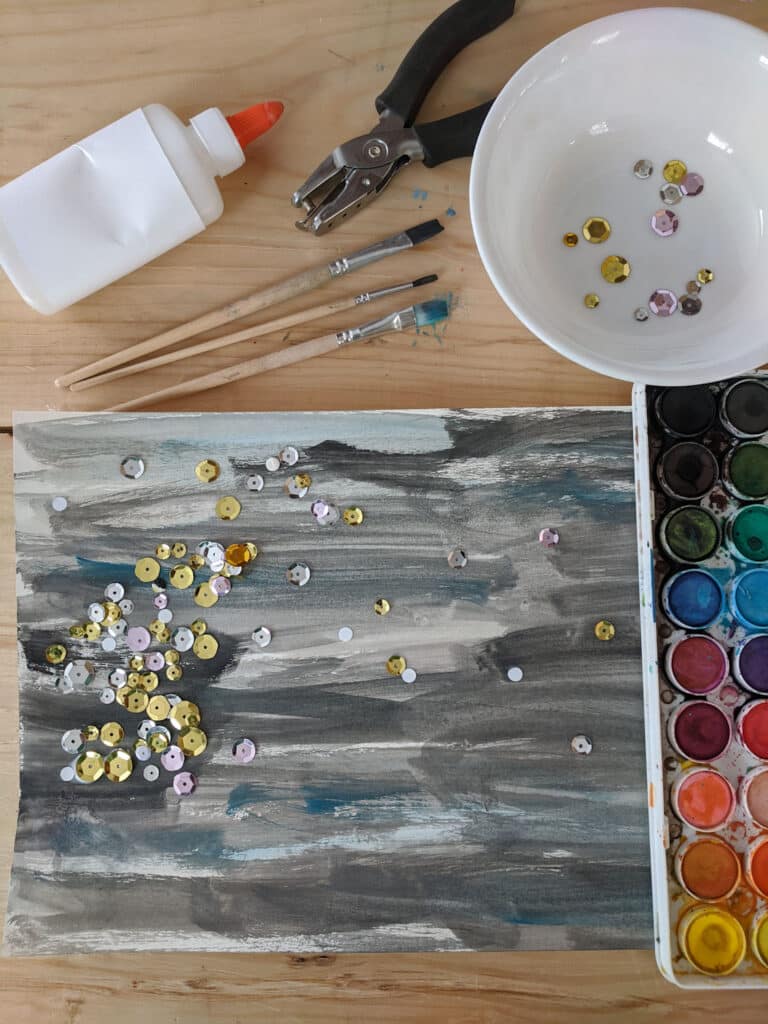
Glitter or Sequins: any color will work, I used gold, sliver, and pale pink
Small Containers or Plates: to hold some glitter and sequins
Painting the Night Sky
There are two different ways you can go about doing this activity:
- Let them paint the sky then give them access to the star making supplies
- Present them with all of the materials at once
I'm going to explain how to do this using the first method.
The first step is to have your children paint a night sky using the heavy weight paper and watercolor paint.
Before they begin, ask them to picture what the night sky looks like. What does it look like before the stars come out?

You can share your ideas out loud and discuss ideas together.
Then let them make their own painting to represent what the night sky looks like before the stars come out.
Let them use the watercolor paints to create their own night sky.
Making Stars
Once they have painted the sky, it is time to add some stars. You do not have to wait for the paint to dry.
To begin, let them visualize what it looks like in the sky once the stars come out.
Let them know they can use any of the supplies to create their own starry sky.

Helpful Tip: If you are doing this with very little children, I would move the paint, paint brushes, and jar of water out of the way before bring out the next set of supplies.
There are a few different supplies your kids can use to make stars in the night sky.
- Printer paper and hole punch
- Glitter
- Sequins
- Glue (regular school glue or glitter glue)
I like to set each of these items on the table within a container or on a plate. This way you are not putting out the entire bag of sequins.
Plus, it helps to keep everything a little organized which lets your kids see what is available.

Your kids can then squeeze the glue on the paper and drop on some hole punches, sequins, and glitter.
Even glue drizzled over the paper will give the appearance of stars once it dries.
The important part is to give them the freedom to create their own unique piece of art.
Once complete, lay the papers flat to dry. If doing this activity with multiple children it would be fun for them to explain their artwork once they finish drying.
It is always fun to hear kids explain what is going on in their paintings. Even a young child, will have a detailed explanation to share which is really fun!
Skills to Practice
The great thing about making art is there are so many important skills being practiced during the activity.
- Fine Motor Skills
- Self Expression
- Making a Model
Both young kids and older children are practicing fine motor skills. Holding a paintbrush, mixing water with paint, and picking up small hole punches are great skills for kids.
If your kids use glue, they are building strength by squeezing the glue bottle.
Not to mention the importance of expressing yourself through art. This is the great thing about making process art with your kids.

Children are encouraged to think about what they want their painting to look like verses making it look like a predetermined product.
They get to be creative and make their own interpretations of the night sky.
One of the important skills in science is to make a model based off of observations made in real life. With this art project, your kids get to make a model to represent the night sky.
Plus, making these types of creations are just plain fun!
Lesson Extensions
There are so many ways to extend this lesson with your kids. Fun for homeschooling, a traditional classroom setting, or even as weekend activities.
- Read a few good books about the night sky.
Don't underestimate the power of reading a few really good books together. These can be children's books or reference books about outer space.
Why not do a mix of the two? Even very young children in preschool can learn from a reference book.
Not sure where to start? Here are a few that I recommend:
- Observe the sky at night and during the day.
Head outside together and make some observations. Not only is observing the sky right outside of your doorstep, free, but it is one of the best ways for your kids to make connections to what they are learning about.
What do you see? How does the sky change? How is the night different than the day?
You can make this as fancy or as informal as you would like. Nature notebooks are a great place to record observations and write down questions.
Maybe check on the night sky every night for a week. Your kids may be surprised by how it can change every night.
This would be a fun way to incorporate a few lessons about stars and constellations.
- Keep a Moon Journal
Learning about the stars and the night sky goes hand in hand with learning about the moon.
Moon journals which have a spot for your kids to draw the moon each day or night are a fun activity.
The phases of the moon post, has a free printable moon journal along with additional moon resources.
These free moon coloring pages are also fun for kids of all ages.
How do you learn about the night sky with your kids? Let us know in the comments below?
Night Sky Process Art

Create your own night sky process art with your kids using watercolor paints, glue, and sparkly sequins.
Materials
- Heavy Weight Paper
- Watercolor Paint Set
- Sequins
- Liquid School Glue
- Plain Printer Paper
- Jar with Water
- Loose Glitter (optional)
- Glitter Glue (optional)
Tools
- Hand Held Hole Punch
- Craft Paint Brushes
- Star Hole Punch (optional)
Instructions
- Use watercolor paints to paint a night sky without any stars in it.
- Using glue, add stars to the night sky using sequins, cut outs from hole punch, and/or glitter.


- Once finished, leave flat to dry.
Notes
Some heavy weight paper including card stock night curl once wet. You can weight down the sides of the paper using the jar of water and paint set.
Give your kids the freedom to use which ever supplies they want to make the starry sky. The goal is for each person to make their own unique creation.
If using glitter, make sure not to touch your face as you do not want glitter to get into your eyes. Glitter glue, is a great alternative to loose glitter.


Cynthia
So thankful for the explanations. Arts and crafts are so fun to do but I definitely need some guidance to teach it to my kids. Thank you!!
Julie
You are very welcome! Enjoy