Kids in pre-K, kindergarten, and elementary school love learning about clouds. Learn how to make your own cloud in a jar with your kids in this step by step tutorial!
There is something fascinating about weather and climate. Maybe its because the weather is always changing. Or because you can easily observe it right outside your window.

I find doing a weather unit study with kids is an easy way to get them excited about learning science.
Making your own cloud in a jar with your kids is a fun way to learn about how clouds form. Hands-on activities are always a hit with kids.
Simple enough to do with preschoolers, yet easy enough to adapt for older children.
This Post May Contain Affiliate Links. Please Read Our Disclosure Policy.
Jump to:
Directions for how to access the free printable pack of worksheets can be found at the bottom of this post.
I actually did this activity with a group of 6th graders during my first year teaching. The kids absolutely loved making their own clouds in jars within small groups.
Each group had their own jar, hot water, and ice. Once they were ready, I went around with the matches.
I vividly remember one child being so excited that they climbed up onto the desk to get a closer look!
Kids enjoy this demonstration so much they often ask for it to be repeated several times. I love how such as simple activity can create so much excitement around learning science!
On a few basic supplies are need many of which you probably already have on hand. Just make sure to have a good supply of matches, so you can repeat the demonstration multiple times.
Materials
Glass Jar: contains the cloud as it forms. I used a 24 ounce glass jar, but a recycled pickle or spaghetti sauce jar work great.
Hot Water: about ½ a cup of water warmed up in the microwave (hot, but not boiling)
Match: one match per jar as you will be dropping it inside the warm water.
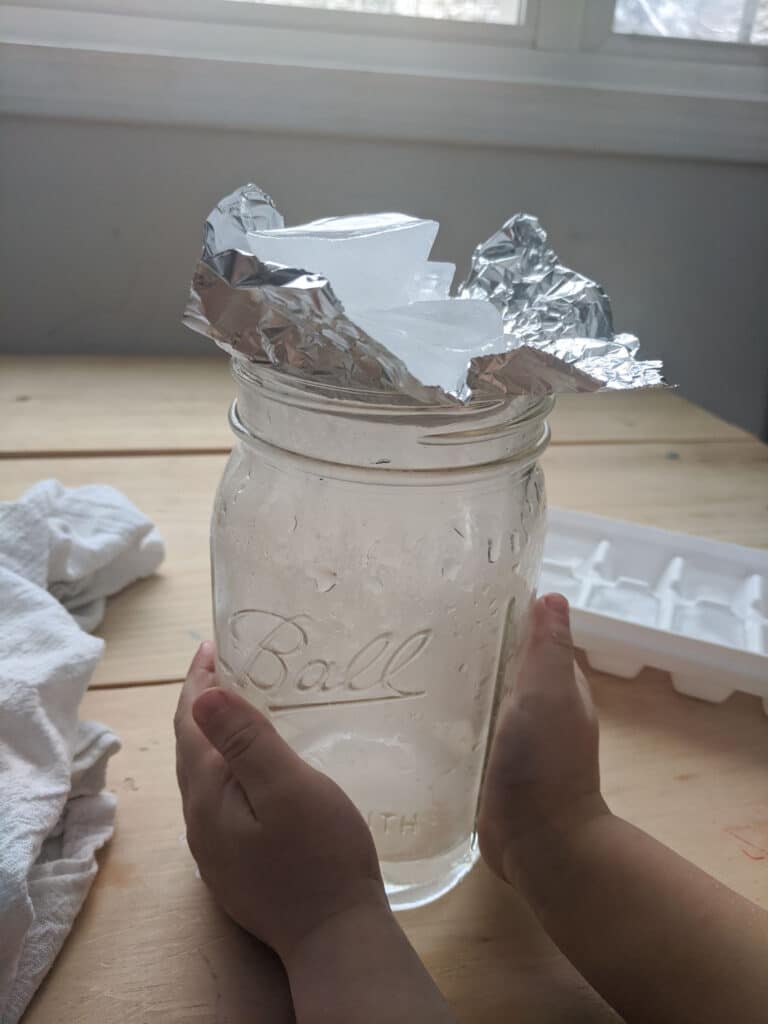
Metal Lid or Foil: I like to make a bowl shape out of foil, but you can use the cover that comes with the jar. It will be placed upside down on top of the jar to hold the ice and keep the cloud contained.
Ice Cubes: at least 2-4 per jar
Activity Sheet: optional, but a place for your kids to record observations.
Directions for how to access the free clouds in a jar worksheets can be found at the bottom of this post.
How Clouds Form
For a cloud to form you need small particles in the air along with the cooling of warm moist air.
In nature, particles from fires, blowing soil, and even salt from ocean water move into the air.

When warm air rises in the atmosphere, it begins to cool. The now cold air can not hold as much water vapor as it could when it was warm.
As a result, the water vapor will condense onto those fine particles found in the air.
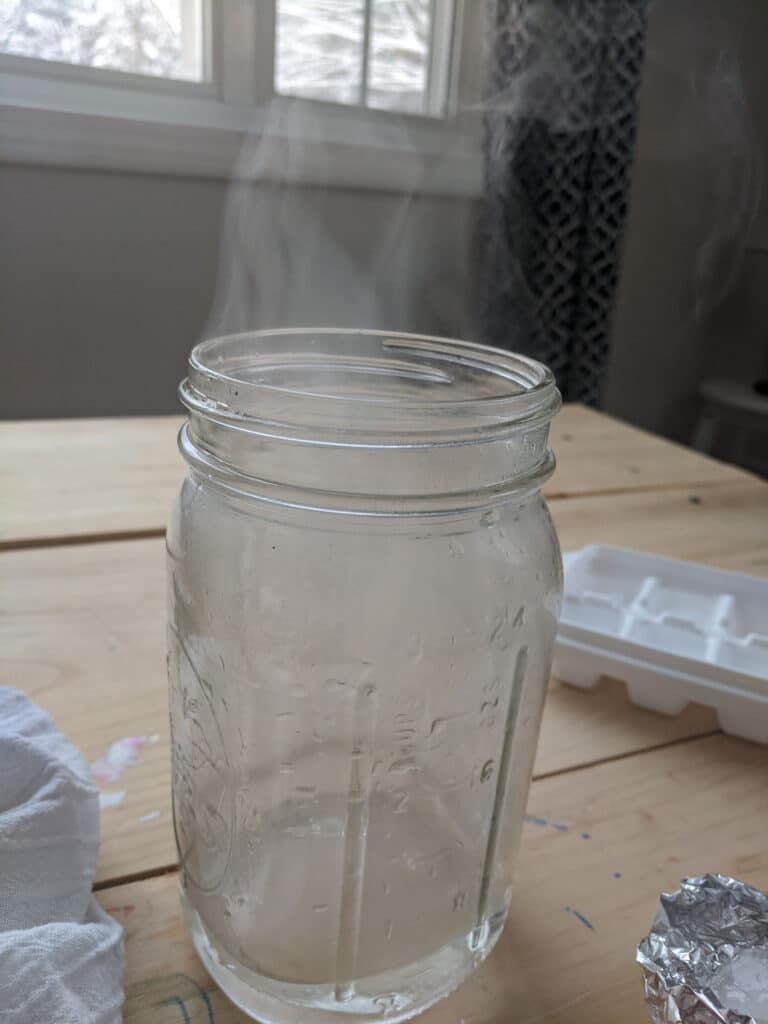
If you look closely at the jar during the demonstration you can see fog moving down from the top of the jar.
Not only is this activity a great way to explore cloud formation, but to see how cool air sinks. Basically, your kids will be creating a convection current within their jar!
- To learn more about cloud formation, check out Cloud Development by NOAA. Their resource is written for adults, but explains the entire process along with how clouds and precipitation form.
- Along with Convection by the University of Illinois
Making A Cloud in the Jar
*Adult supervision is required during all parts of this activity.
First gather all of your supplies and place them on a table.
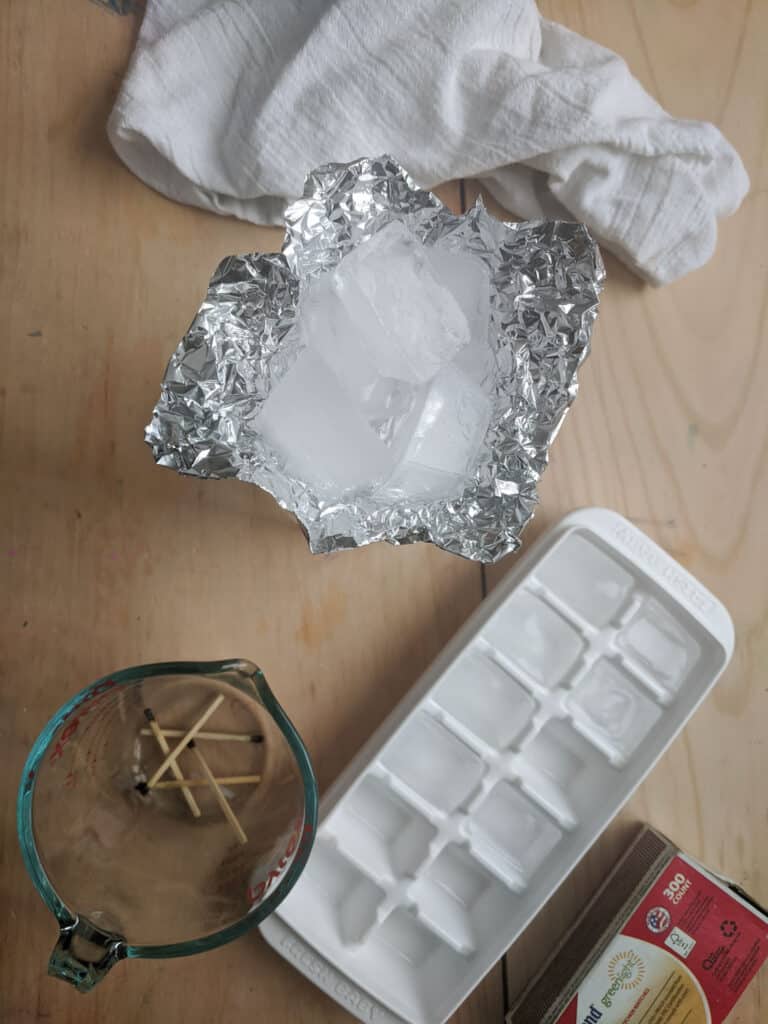
Next, place the lid upside down on the table next to the jar. Add 2-4 ice cubes into the lid and set it to the side.
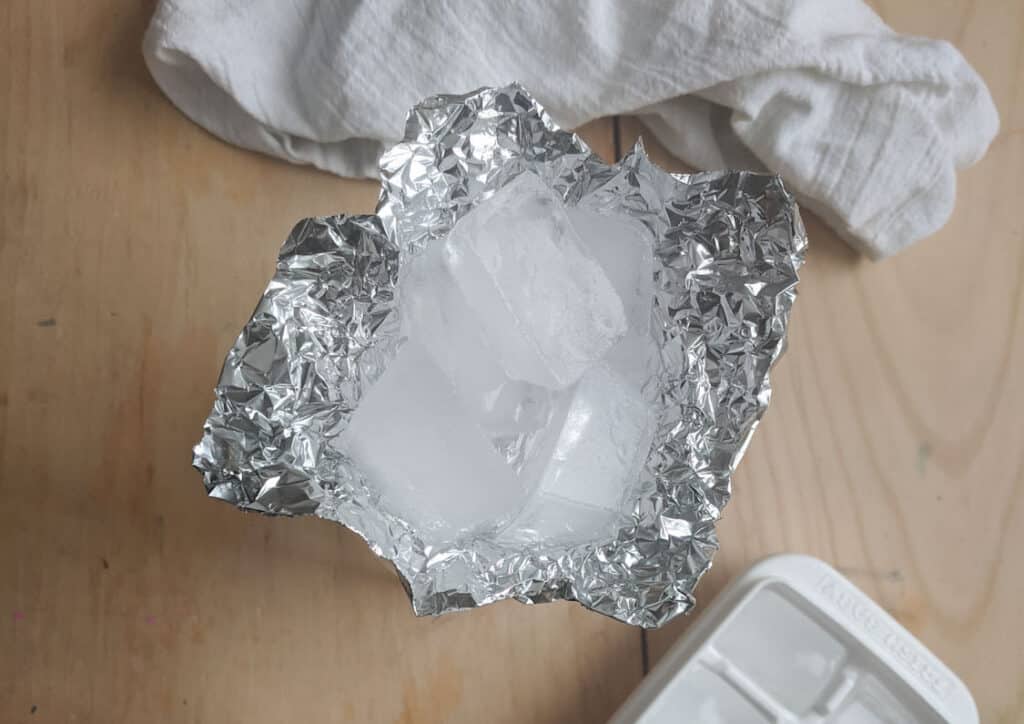
You can use a metal lid that comes with the jar or a piece of foil. The goal is to hold the ice along with keeping the air inside the jar. I prefer to use a piece of foil curved into a bowl shape.
Adding the Water
Then place ½ cup of water in a microwave safe container. I used a glass measuring cup. Heat up for 1 minute.
If you do not have a microwave, pour the water into a pot and heat it up on the stove until warm (not boiling).
Once heated, pour the warm water to the glass jar.

Often times, excess condensation will form on the sides of the jar. To remove, simply tilt the jar and swish the warm water around. You want your kids to be able to see what is happening inside.

Aside from the risk of burns, using boiling water will create too much condensation on the sides of the jar.
Adding Smoke Particles
Once you can see inside the jar from the side it is time to light the match!

Now, the goal is to trap as much as the smoke inside the jar before it escapes.
To do this blow out the match then drop it into the jar while it is still smoking. Quickly, place the lid holding the ice on top of the jar.

Within seconds a cloud should begin forming. I like to leave the lid on for about 2-3 minutes before releasing the cloud.
You want to give your kids enough time to observe what is happening inside the jar. If they look closely they can see fog falling down from the lid.
Releasing the Cloud
Now, for the fun part, letting your kids release the cloud. Simply hold the lid with two hands and lift it up and off of the jar.
I love how something so simple can make a magical moment for your kids!
Recording Observations
If recording observations on a worksheet, now is a good time to write a few things down. Another option is to do this twice.
Let your kids just observe the first time, then write down their observations the second time.
FAQ's
- Does the water need to be boiling?
No, hot water works just fine for this experiment. If the water is too hot, excess condensation will form on the jar. Making it hard for your kids to see what is happening.
- Can you use a plastic jar instead of glass?
The experiment should still work, but you want to make sure the plastic does not begin to melt if the water is too hot. Pick a jar that is transparent and not tipsy.
- I don't have any ice, will anything frozen work?
Yes! I actually used a bag of frozen peas as a test and it worked just fine. Again, just make sure the frozen object is not going to fall off the jar.
- We don't have any matches can something else be used instead?
Yes, a quick spray of aerosol hair spray will also work. In the past, I used both hairspray and a match, but really you only need to use one or the other.
Just make sure to spray directly inside the jar if using aerosol hair spray.
- There is too much condensation on my jar. Why is this happening?
Just like how water vapor condenses on dust particles in the air, it will do the same on the surface of the jar.
Try swirling the jar around to clear off some of the condensation before dropping in the match. You can also use a towel to wipe away the water on the surface of the jar.
If this happens it is a great time to discuss why it is happening with your kids!
Printable Activity Sheets
One of the best things about this science investigation is you really can do this activity with a wide range of kids.
Even as a homeschooling parent with children of different ages, you can all do this experiment together.
Included in the printable pack are three different worksheets.
Related Post: Printable Weather Flashcards for Kids
Basic Activity Sheet
A large jar on the page with lots of room for your little one to draw their observation.
Labels including: hot water, ice, condensation, water droplets, and cloud can be added to their illustrations. A great basic worksheet to use with kids.
Detailed Activity Sheet
Room for your kids to write the question they are going to explore. Along with spaces to write out the materials and safety.
This page also has room to draw observations within the jar. Plus a spot to record written observations

Worksheet with Further Questions
Pair this page with some research about how clouds form. Children's books about weather are a great place to start. Many can also be found at your local library.
Kids love looking through The Cloud Book. Large real life photographs of clouds and different optical events in the sky.
The Great Big Water Cycle Adventure is a beautifully illustrated story that explains how water moves through the water cycle.
There is so much to be learned from reading a few good books with your kids. Let this sheet guide their research after they conduct the investigation.
How this Experiment Works
As the warm moist air rises in the jar, it cools once it reaches the top of the jar where the ice is placed.
In order for a cloud to form within your jar, you need to add some particles into the air.
Aerosol hairspray is often used along with a freshly blown out match.
I've used both and have found that even a smoking match without hairspray adds enough particles into the air for a cloud to form.
Warm water in the bottom of the jar provides the warm air and moisture. While the cold ice cubes on top of the jar will cool the air as it rises.
As moist warm air rises, it comes into contact with the cold ice, it cools and becomes supersaturated. Basically, it can not hold onto as much water vapor as it did when it was warmer.
The smoking match added the particles into the air. While the ice on the top of the jar made a cold patch which cooled down the warm moist air.
At the same time, the water vapor in the air also comes into contact with the smoke particles within the jar.
If you look closely at your jar when the lid is still on, you should be able to see fog moving down from the lid within the jar.
It is really fascinating for kids to see!
Along with cloud formation you can easily talk about why cold air sinks and warm air rises. Or even how water travels through the water cycle.
So much fun science topics to explore with one hands-on activity!
Related Posts
Don't forget to get the copies of the worksheets below!
Download
Set of Cloud in a Jar activity sheets in PDF format!

How to Make a Cloud in a Jar

Make your own cloud in a jar using simple household materials! Perfect for kids in pre K through 6th grade.
Materials
- Glass Jar
- ½ Cup of Water
- 2-4 Ice Cubes
- Metal Lid or Piece of Foil
- Matches
- Container to heat up water
Tools
- Microwave or Stove Top
- ½ Cup Measuring Cup
Instructions
- Place empty glass jar, matches, lid or foil, and ice cubes on a table.
- If using foil instead of a lid, make it into a bowl shape to hold ice cubes.
- Add 2-4 ice cubes to the upside down lid or bowl made out of foil. Place to side.
- Heat up ½ cup of water in a microwave safe container for 1 minute. You can also heat up water using a stove top and a pot.
- Carefully, pour warm water (not boiling) into the empty glass jar.
- Light a match above the opening of the jar. Then blow it out.
- While the match is still smoking, drop it into the jar. (You want to capture the smoke particles within the jar)
- Quickly, place the lid or foil holding the ice cubes over the jar.
- Watch and wait 1-2 minutes.
- When ready, lift off the lid to release the cloud.
Notes
*Adult supervision is required for all steps of this experiment.*
For best results, use warm water not boiling. Sometimes the sides of the jar contain too much condensation once you add the warm water. To fix this, swish the warm water around within the jar to remove the condensation.
To repeat the experiment, dump out the water with the match and re-fill with freshly warmed water.
If you do not have any matches, an aerosol based hair spray can be used instead. Simply, add one quick spray into the jar of warm water before adding the lid with ice.


Natasha
This is a great exercise to teach children (and adults - ahem*) about cloud formation. Great activity, thanks for sharing!
Julie
Yes! Great for adults and kids 🙂
Allie
I love how creative you are. It’s nice to give kids a project, versus watching tv. I always forward your posts to my best friend. Her kids always enjoy the printable’s and projects.
Julie
Thank you for your kind words Allie! I'm so happy to hear that she is enjoying the resources (and thank you for sharing them!)
Mariam
This is so interesting! I don't have any kids, but I still want to try it 🙂 Thank you for sharing!
Julie
You should it is really easy and fun even for adults!
jamie
Wonderful experiment Julie, I love it and can't wait to do this with my kids! Thank you for the thorough resource.
Julie
Your very welcome Jamie! I hope you and your kids have fun conducing the experiment