Have you ever sliced an apple, only to find it has quickly turned brown? In this apple experiment, kids will observe how different liquids effect the process of apple browning.
Practicing science is fun and hands on with this classic science experiment!
Science Concepts
If you are learning about science with your kids, simple science experiments are a fun way to practice the scientific method. One of the best ways to test out a hypothesis is through a hands on exploration.

This Post May Contain Affiliate Links. Please Read Our Disclosure Policy.
Jump to:
- Science Concepts
- Why Do Apple Slices Turn Brown After being Cut?
- Recommended Age Range
- Apple Oxidation Experiment Worksheets
- Preparation
- Materials
- Optional Liquids
- Directions
- Helpful Hints
- The Science Behind Apple Browning
- Concept of Apple Browning
- More Apple Activities and Project Ideas
- Comparing Different Varieties of Apples
- Storing in a Plastic Bag vs No Bag
- Other Browning Fruits
- Download
- Comments
In this apple science experiment, kids will learn about the process of oxidation. Depending on the age of your kids, you can modify how much of this experiment they set up and run on their own.
A great activity to go along with this is to do an apple exploration with your kids to learn about the different parts of an apple.
If you are looking for ways to explore apples with your kids, check these additional apple activities for kids.

The great thing about experimenting with kids is that you can take a lesson and modify it to fit your needs.
If your child is practicing identifying variables and designing an experiment, they can be in charge of that part.
While for younger kids, you can provided a more guided approach.
When doing this with elementary aged kids, you can have them pick the liquids, help cut up the apples, and run the timer.
Younger kids can make observations, pour liquids, and drop the apple slices into the different containers.
Kids of all ages love having jobs, especially when running an experiment. Before you begin, decide who will be in charge of each task. Don't forget about clean up! Kids can be in charge of putting back supplies or washing containers.
Why Do Apple Slices Turn Brown After being Cut?
Apple oxidation, commonly called browning, happens after an apple is sliced or damaged. Various liquids can be used to slow down apple browning. (source)
If you are doing this apple experiment with young children that will be enough of an explanation. However, a description of the process along with vocab terms if doing this with older children can be found later on in the post.
More Autumn Activities: Painting with Apples and Fall Leaf Printables
Recommended Age Range
- Elementary
- Middle School
If I was going off of the description above I would say, middle school aged kids. But honestly, young kids even preschoolers will enjoy this experiment.
What is great about this science experiment is that you can tailor it to fit your child's needs.
Remember, you do not need to explain all of the fancy scientific concepts that are found later on in the post.
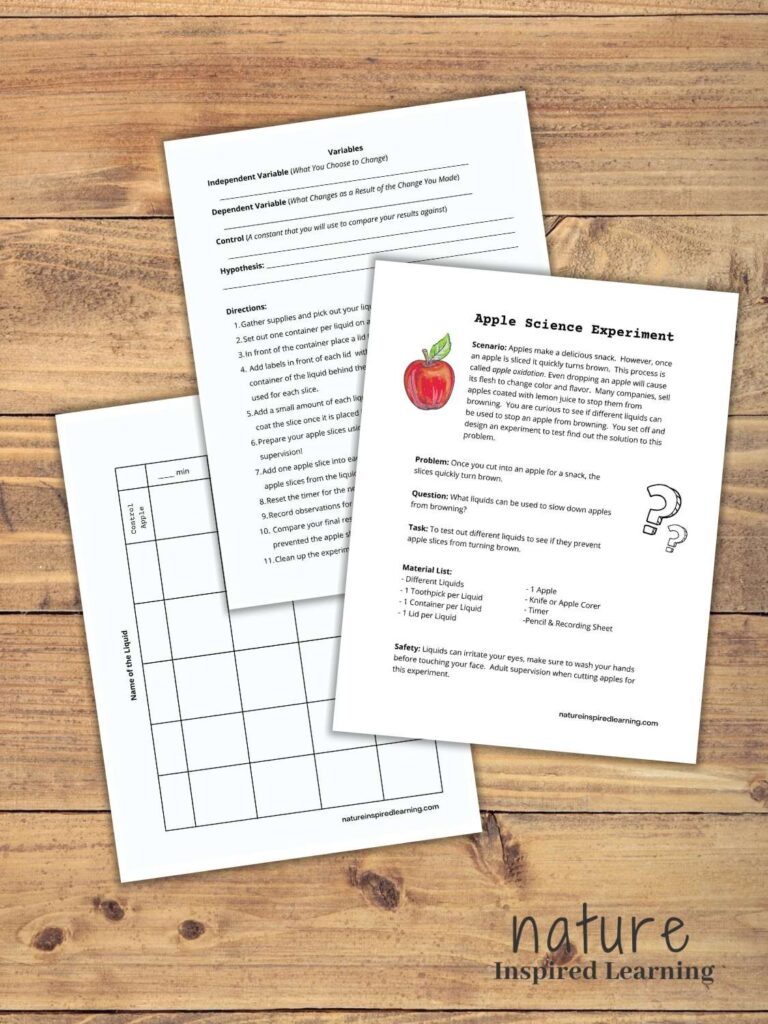
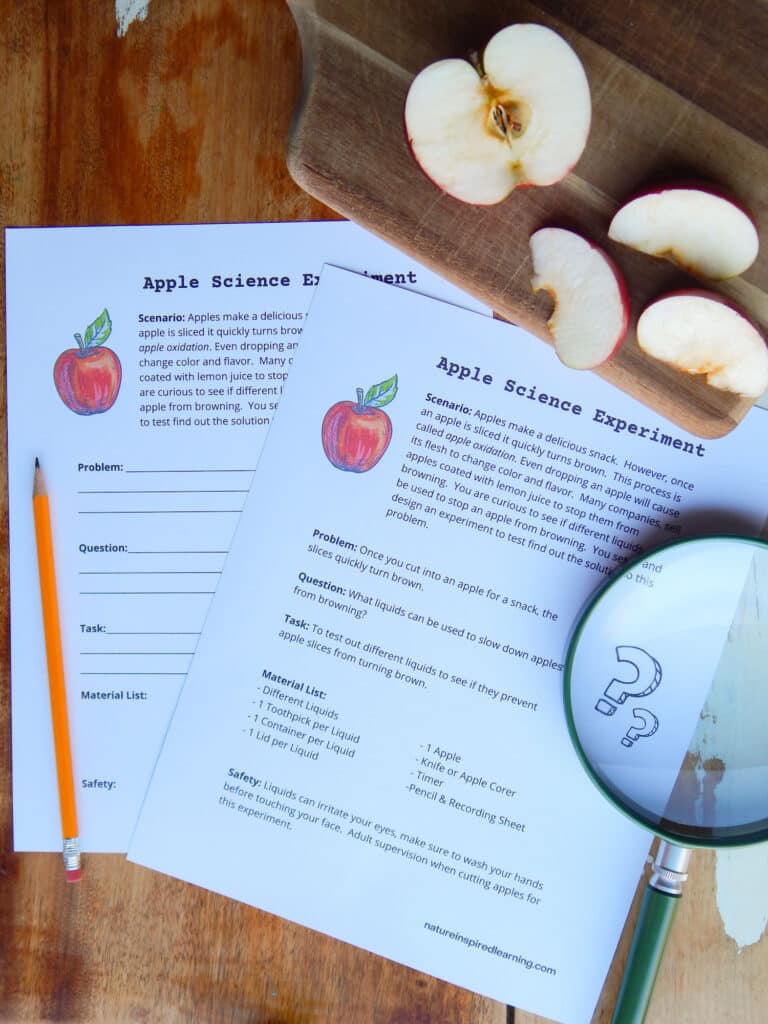
Apple Oxidation Experiment Worksheets

Lab sheets are great for elementary and middle school aged kids. Young children can simply discuss the changes you see.
There is also a guided version of the worksheet available for download as well. This version has some of the parts filled out for your child.
Directions for how to access the downloadable free printable worksheets is found at the bottom of this post.
Preparation
Before beginning this experiment you will want to gather a few supplies. First make sure you have apples! Depending on how many kids are doing this experiment will determine the amount of apples you need.
One apple is more than enough if you are doing it at your house with your kids.
If trying this out with a larger group, I would plan on having a few apples. I try to not be wasteful with food, so I sliced the apples very thinly.
Before doing the experiment with your kids, I would go over the directions, fill out the lab sheet, and talk about what you will be doing. Then begin the experiment with your kids.
Often times kids are so excited to get started that they miss out on practicing important science skills such as identifying variables and making a hypothesis.
Slicing the Apples

You will also need a safe way to cut the slices using either a knife or apple corer. I used a knife with a cutting board and cut the apples for my child.
Picking Out the Different Liquids
For this apple experiment, your kids will be testing out different solutions to see how well they prevent browning of the apple pieces.
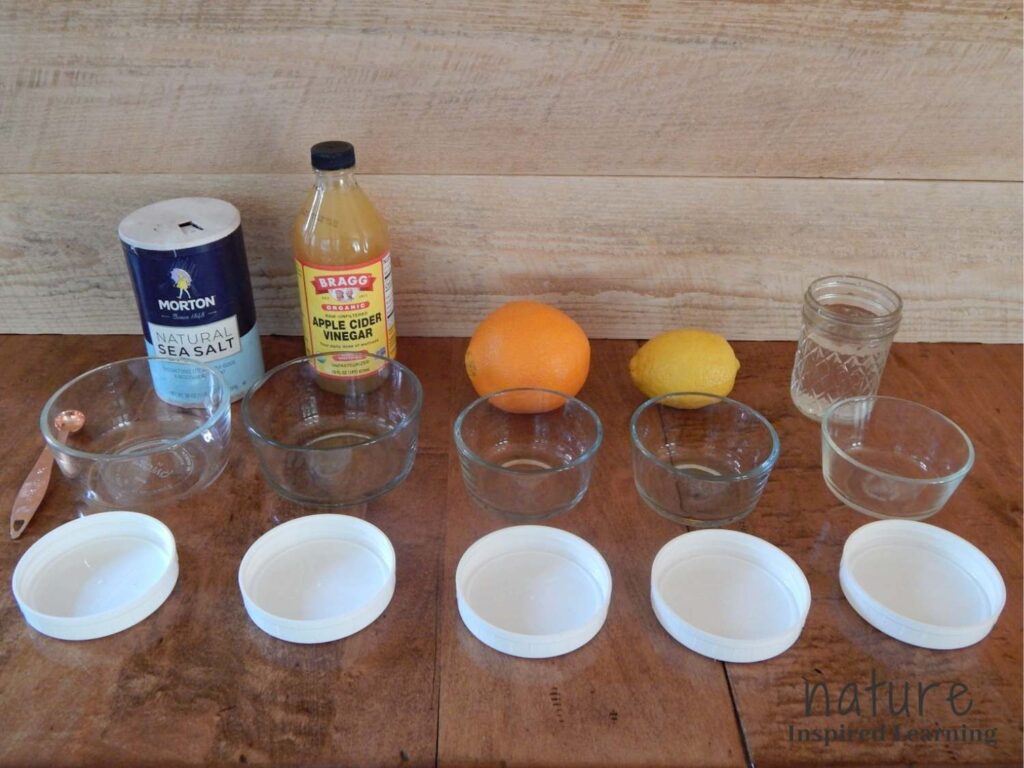
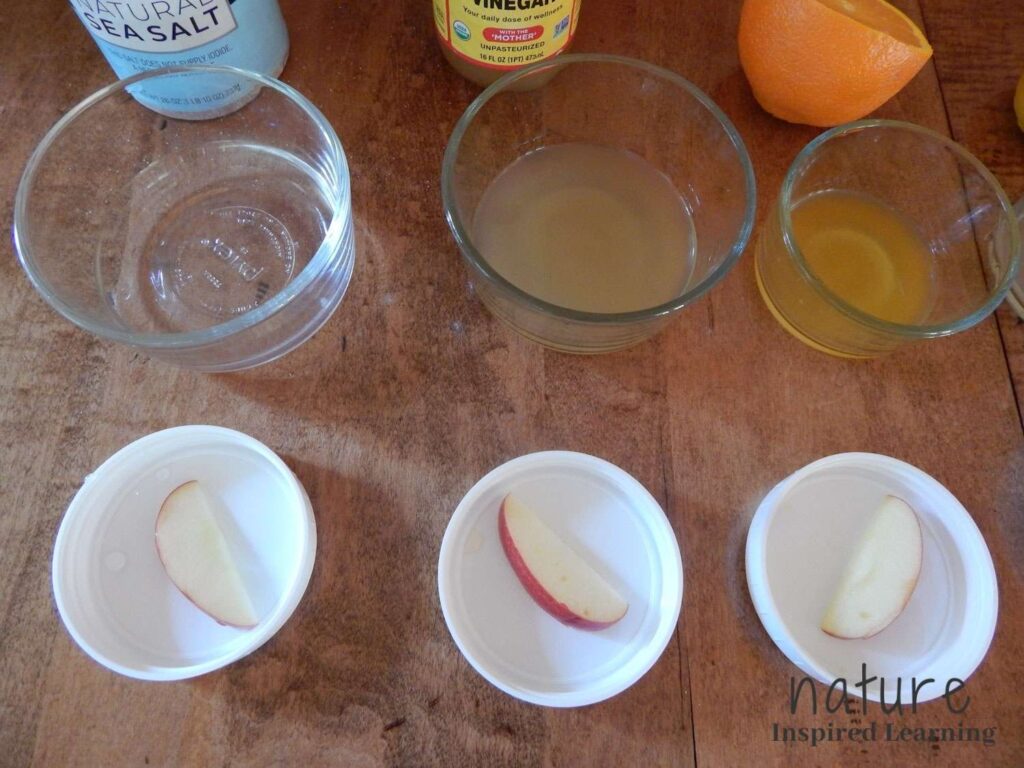
Pick out the different liquid substances before beginning this science project. You will also need containers to hold the liquids, I used small glass Pyrex containers.
After the materials list below, I give you a few recommendations for liquids.
As you can see from the image above, I used salt water, apple cider vinegar, freshly squeezed orange and lemon juices, and plain water.
Materials
- 1 Apple
- 1 Container per Liquid
- 1 Lid per Liquid
- 1 Toothpick per Liquid
- 1 Knife or Apple Corer
- Cutting Board
- 4 or More Liquids
- Water (Control)
- Flat Work Surface
- Recording Sheet
- Timer
- Optional: magnifying lens
Optional Liquids
| Salt Water | Fresh Orange Juice |
| Vinegar | Fresh Lemon Juice |
| Apple Cider Vinegar | Fresh Grapefruit Juice |
| Milk | Baking Soda and Water |
Directions
All of these directions can be found on the downloadable lab sheet. Even if you do not use the sheet with your kids, it may be helpful to have printed directions.
- Gather supplies and pick out your liquids
- Set out one container per liquid on a table.
- In front of the container place a lid (this will hold the apple slice)
- Add labels in front of each lid with the name of the liquid or place the main container of the liquid behind the set up. You want to easily see which liquid was used for each slice.
- Add a small amount of each liquid into each of the containers. Enough liquid to coat the slice once it is placed in the liquid.
- Prepare your apple slices using a knife or apple corer. *As the adult, I cut the apples
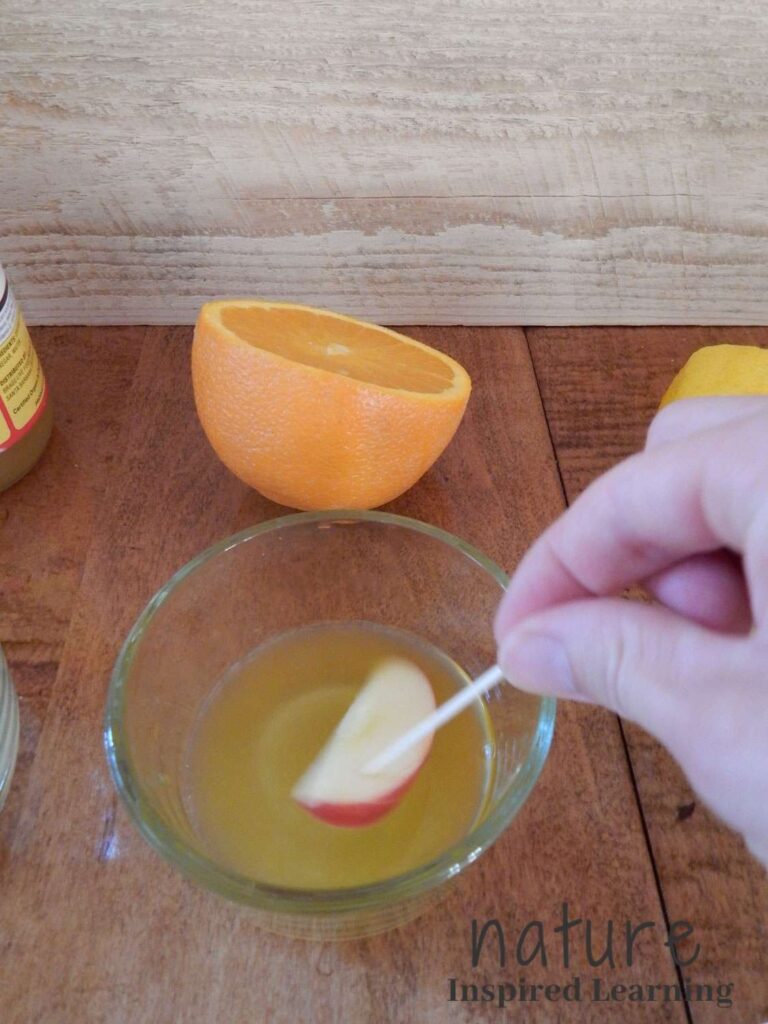
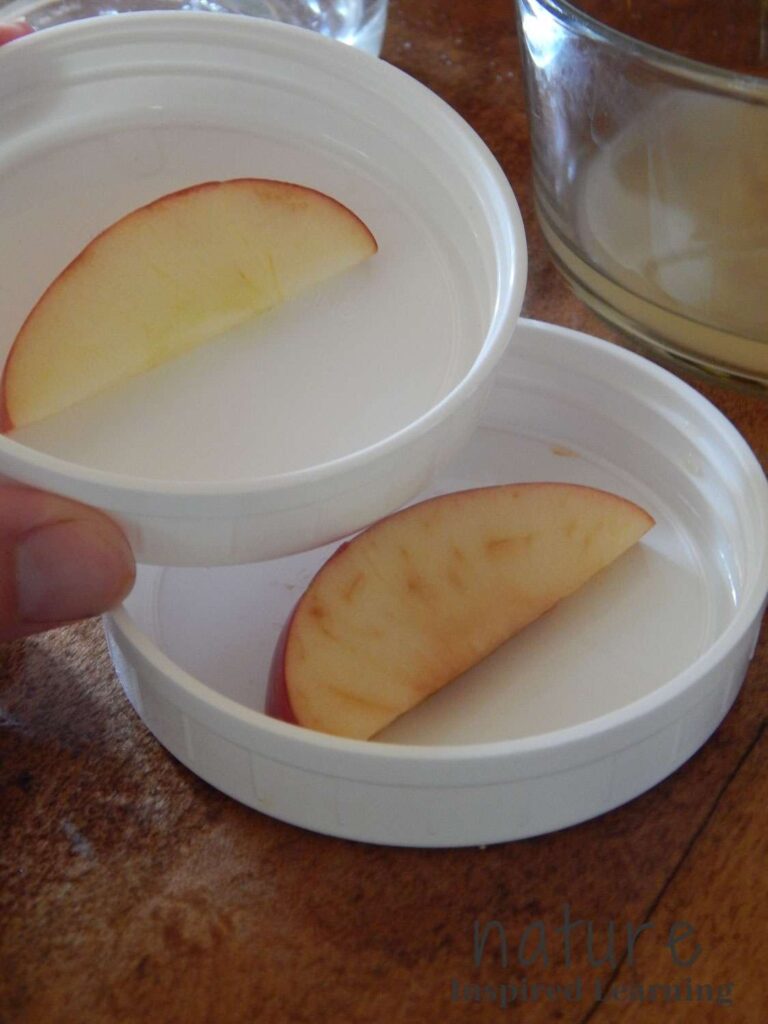
- Add one apple slice into each of the liquids. Set the timer for 1 minute. Remove the apple slices from the liquids using a toothpick. Place slices onto the lids.
- Reset the timer for the next length of time then make your observation.
- Record observations for one minute, 10 minutes, 20 minutes, and 40 minutes.
- Compare your final results after 40 minutes to the control. Record which liquid prevented the apple slice from browning the most.
- Clean up the experiment. Then write your analysis and conclusion.

Helpful Hints
If you do not have lids available, parchment paper or plates can be used. I would not recommend placing wet apples directly onto a paper towel because the liquid can saturate the towel.
You can use more than four liquids, just make sure to plan one lid and glass container per liquid. Water will be the control which also needs a lid and container.
When I ran this experiment with my child, we used plain water as the control apple. However, I noticed the apple left out without being dipped into the water showed more signs of browning.
I recommend leaving a slice out on the table that never is dipped into a liquid. Kids can compare the results to that apple as well!
The Science Behind Apple Browning
Now the fun part, the science behind why apples turn brown. Depending on the age of your child will determine how in depth you want to explain this process.
I broke up the vocab terms into simple and advanced.
However, you can do this fun science project without explaining all of the fancy science terms! I included them in case you want to go that route with your kids. Some kids love knowing the why behind what they are seeing.
Simple Vocab Terms
- apple or fruit
- liquids
- guess or hypothesis
- browning
- experiment
- observation
- reaction
- results
Advanced Vocab Terms
| chemical change | enzymes | |
| chemical reaction | control group | |
| dependent variable | hypothesis | |
| scientific method | oxidation | |
| oxygen | reaction | |
| compound | experiment |
Concept of Apple Browning
When apples turn brown, they are undergoing a chemical change as the slices are exposed to air.
If you happen to have older kids, they could also do this experiment along with researching the advanced vocab terms.
The source listed above has some great information about the process of apple oxidation.
More Apple Activities and Project Ideas
The best thing about practicing science with kids is tapping into their natural gift of curiosity. Kids come up with the best ideas as they question how the world works.
Use one or all of these lesson extensions to explore more about apples with your kids.
Always make sure to have a control group so that you are conducting a true science experiment. Plan out the experiment using the scientific method before beginning.
Comparing Different Varieties of Apples
It would be so much fun for kids to test out different kinds of apples. They can use the best liquid found from this experiment.
This is a great way to test out how well it works at keeping different kinds of apples from turning brown.
After doing the initial experiment your kids may wonder if the kind of apple will effect the browning process.

Storing in a Plastic Bag vs No Bag
Many stores sell pre-sliced apples in plastic bags. With this fun experiment, have your kids test to see how apples placed in plastic bags compare to ones being left out in the open.
For a fun variation, kids can test to see if flattened out bags with most of the air removed will effect browning.
They can compare the results of flattened bags to ones having a large amount of air left inside.
Other Browning Fruits
Conduct an easy experiment similar to the apple science experiment. Have your kids brainstorm then pick out a few other fruits that also brown once sliced.

If they are not sure if any other fruits change color they can do a science project where they slice a variety of fruits and observe the changes in color.
Then they can test out different liquids and record the results. It would be fun to see if the same liquids had similar results for different fruits.
Make sure to download your free copy of the apple experiment below!

Terms of Use
These worksheets were created by Nature Inspired Learning and are for personal use only for your home, classroom, or public library see full disclosure. All of these apple experiment worksheets are for non-commercial use.
Download
Two different versions: a guided version and a blank activity sheet.


Ashley
Oh my kids will love this! Thanks for all the information. Can’t wait to try it!
Julie
Your very welcome Ashley, I hope your kids enjoy the experiment
Mikaela
What a fun experiment! I am going to have to do this with my class!
Julie
Awesome! I hope they enjoy conducting the experiment
Laura
You have so many great tips for doing this experiment! Great idea!
Julie
Thank you Laura
Kelsey
So many great ideas here that anyone could do! Thanks for sharing!
Julie
Thank you Kelsey! Yes easy to do even as a spur of the moment activity when cooking with apples
Ada
I love this apple science experiment! It is a fun way to learn science. Thank you so much for sharing!!!
Julie
Your very welcome Ada
Cindy
My children love apples. These will be so fun! Julie, on these cold days, do you know how to make fake snow ? Cindy
Julie
Hi Cindy,
I'm not sure about how to make fake snow possibly with baking soda and water (however it wouldn't be safe to eat)? Or if you are able to use a mini snow cone machine that grinds up ice to make "snow" that would be fun too!
Farren
I'd love the Apple Oxidation Lab freebie, thanks!
Julie
Hi Farren, There is a sign up form at the end of the post for a PDF version of the activity sheets. Best, Julie
Stacey
I love this so much!
Julie
Hi Stacey! Enjoy, happy exploring
Josie Heflin
I'm super excited to do this with my son!!! Thank you so much for this!!!
Julie
Hi Josie,
You're very welcome! I hope you both have fun.